All new seals and gaskets. Case and all parts thoroughly degreased and cleaned.
Cam plug JB Welded (as per Greg Bender's ThisOldTractor site), this is a point of leakage that I'd rather deal with now then once it ruins the clutch.
Getting everything lined up, no I didn't reuse those tab washers, but they were cleaned in conjunction with everything else. I'm trying out a new assembly lube, this one made by Amsoil. It's interesting, the previous lubes I used were silver/grey and this one is red which helps a little in seeing the amount of coverage on the parts.
Front bearing flange installed. In lieu of tab washers, I used 0.88mm thick wave washers as per Moto Guzzi revisions.
Camshaft lubed up and ready for installation
Installed
New rear main seal, lubed around the outside.
This is a BMW rear main seal installation tool intended for use in conjunction with the crankshaft. This won't work on Guzzis since the rear crank face is proud of the bearing flange, and the center 12mm bolt area is proud of the face as well. I was able to use the tool by putting a 12mm bolt through the center of the tool and reinforcing the back of the bearing flange with a bar and then tightening it up and pulling the seal in.
Reinstalling oil tubes with new seals and crush washers prior to reinstalling crank.
Placing the case on wooden blocks in prep for the crankshaft install. The case needs to be raised as the front of the crank protrudes from the case by 3 or so inches.
Dropped in.
New seal held on with grease
Bottom bolts for the rear bearing flange with sealant. I used Permatex Ultra Grey.
Con-rod bearings lubed
Con-rods installed with new tab washers. NOTE: When installing the connecting rods, the oil holes must both be facing the right cylinder (when viewed from the clutch area), meaning the right connecting rod's oil hole should be facing down and to the right and the left connecting rod one should be facing right and up. The numbers stamped on the rods should be lined up with each other as well.
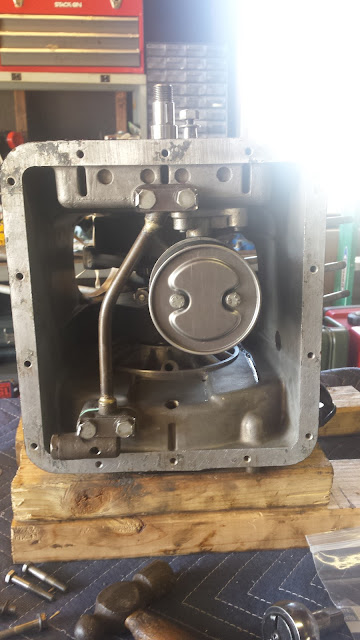
Oil pump finger tightened in place. The 9 o'clock and 12 o'clock bolts are the smaller bolts that secure the pump directly to the case, the 6 and 3 o'clock bolts are the longer ones that secure the oil pickup/filter screen to the oil pump/case. The bolt to the right side of the pump is also the shorter type and is the third bolt utilized in securing the pickup to the case.
Pickup in place, assembling strainer.
Sump area buttoned up.
Timing gears reinstalled. The camshaft timing gear is very, very close to the front bearing flange bolt heads since I used the wave washers in lieu of the thinner tab washers. I didn't fully torque down the nut on the camshaft yet, but I'll need to measure clearance through an entire rotation of the cam once I do to ensure nothing is rubbing anywhere. If it is, I may have to retain the tab washer on the top two bolts solely for clearance purposes.


No comments:
Post a Comment