Yesterday I got around to applying the Caswell Epoxy Tank Sealer to the tank innards.
Like I mentioned before, the tank was solid, but very rusty. Caswell is supposed to bond to rust, but they advise to throw in some sheetrock screws and acetone to break up the loose bits, which I did, but didn't feel like I got enough of the flaky rust off. I then decided on doing the vinegar trick, but instead of a day I just used it for half a day and then applied a pressurized stream of water for the rinsing and acid neutralizing (just used baking soda). That worked out much better at getting some of the stubborn stuff out and did a decent job of cleaning the rust - if I left the vinegar in for a whole day or two it probably would have cleaned everything, but this epoxy doesn't really care about rust so neither did I. As far as drying off the tank, I connected the hose for my vacuum to it's exhaust port, essentially turning it into a powerful blow-dryer, worked like a charm. Onto applying the sealant.
Caswell tells you to wrap the tank with glad wrap, followed by a layer of aluminum foil, and then another layer of glad wrap. As you can see above, I skipped the aluminum foil part and instead went with 3 layers of plastic wrap, followed by some masking tape for extra protection around the top of the tank where I'd be pouring in the epoxy. I found that this much protection was unnecessary (especially if you drain the epoxy out of the petcock holes) for the most part, but I did get a few drops on the masking tape part when I flipped the tank over after draining the excess sealant, let me explain. This Benelli tank's petcock holes are internal thread, so in order to protect the threads from getting epoxied over, I threaded in some M10x1.0 bolts wrapped with teflon tape and had to drain the excess out of the top which was a little messier. I'm confident that if you are careful and have externally threaded petcocks (like on my BMW) you could drain out of the petcocks and not spill a drop on the tank... but anyway...
The stuff is the consistency of a thick molasses or honey and must be spread around the inside of the tank slowly - Accomplished by sealing off all holes and sitting for 15 minutes with a tank in your lap rotating it around. They advise to do the job at a temp of 70F and that just happened to be the temperature inside my house exactly yesterday (we don't have central air). Caswell says half the supply they give you is good enough for a tank of 5 gallons or less - I found that to not be the case. This tank is 3.75 gallons and I got about 70% or so coverage, so I had to mix up the remaining supply and add it (I waited 4-5 hours after the first batch as the stuff was still tacky, but more or less set in place, Caswell says a second coat can be added within the first 24 hours as long as the stuff is tacky). After all was said and done, there was only 4oz. of excess epoxy using the entire kit, so I'd advise using the entire kit right from the start if you're doing a similar job. If this was the stock Aermacchi peanut style tank I think the half would have been fine.
It's been close to 24 hours of curing and the stuff is rock hard. They recommend letting the epoxy cure for 24-36 hours before adding any gas to it, but it'll probably be 48 hours before I get a chance to gas it up. I couldn't get a good picture of the coating, but it looks like a layer of glass, probably a a couple millimeters or so thick. I love the thickness of it, but I don't like the fact that it's clear, because ignoring the gloss finish of the sealant, it still looks like a shitty tank on the inside (i.e rusty, even if encapsulating and no longer rusting). I wish they added a black dye to the epoxy or something, just to mask the appearance of the tank inside. Oh well, as long as the stuff works and it definitely seems like it will.
I'm still waiting for the Aermacchi tank side decals to arrive, but I couldn't resist adding the ones I bought for the stripe area.
It's looking good and now I really can't wait to get this thing back on the road. We're in the home stretch!
14 June 2013
12 June 2013
generator, tank, and stove
I think I got to the bottom of why the generator wasn't charging. Having read on an Aermacchi yahoo group that the most common cause of generator problems is the generator warning light grounding out, usually happens during restorations. Well I started at the generator and worked my way through the wiring, up to the warning light and sure enough, I forgot to put the plastic insulating washer back on when I switched dash pods. It amounts to a thin, white piece of plastic that fits between the light socket and the aluminum dash pod, and there it was sitting in the bolt dish I have on my workbench. Put it back in and it appears that I'm getting a charge again. Haven't taken the bike for a test run yet, but I'm keeping my fingers crossed...
Powder coating is finally done on the gas tank
I still have to put some epoxy sealer on the inside (no holes, but a lot of rust), but today was so nuts I didn't get a chance to - maybe tomorrow during the apocalypse storm the weather man is predicting. I did clean up the loose rust on the inside with some acetone and dry wall screws, and while that was drying I test fit the tank on the bike
Bad photo, but it's looking good. I found the vintage Aer Macchi decals I bought from MotoMacchi to be too small for this tank, so I went ahead and ordered these on eBay. I don't like the design as much as the MotoMacchi ones, and I'm not crazy about the gold lettering, but they're still nicer than the Harley Davidson decals
Also got a bid on a Guzzi Stornello Sport style seat, we'll see how that goes...
In other news, my buddy Joe was getting rid of an Elmira Stove Works 1850 range that came with the house he just bought. Not his style, but definitely my wife's, gave me a killer deal on it, all 500lbs of it that we had to move. Now it's just going to sit idle in storage at my parents' place until we sell our house and move into a new place, whenever that will be...
Hoping to have the Macchi back on the road by next week, maybe the next update will be a good one
Powder coating is finally done on the gas tank
I still have to put some epoxy sealer on the inside (no holes, but a lot of rust), but today was so nuts I didn't get a chance to - maybe tomorrow during the apocalypse storm the weather man is predicting. I did clean up the loose rust on the inside with some acetone and dry wall screws, and while that was drying I test fit the tank on the bike
Bad photo, but it's looking good. I found the vintage Aer Macchi decals I bought from MotoMacchi to be too small for this tank, so I went ahead and ordered these on eBay. I don't like the design as much as the MotoMacchi ones, and I'm not crazy about the gold lettering, but they're still nicer than the Harley Davidson decals
Also got a bid on a Guzzi Stornello Sport style seat, we'll see how that goes...
In other news, my buddy Joe was getting rid of an Elmira Stove Works 1850 range that came with the house he just bought. Not his style, but definitely my wife's, gave me a killer deal on it, all 500lbs of it that we had to move. Now it's just going to sit idle in storage at my parents' place until we sell our house and move into a new place, whenever that will be...
Hoping to have the Macchi back on the road by next week, maybe the next update will be a good one
01 June 2013
aermacchi generator
I disassembled the generator today as the armature I got off eBay arrived. Still waiting for the field coils, but I had the house to myself so I figured I'd get an early start.
I bought this nifty puller months back. It has the left hand thread to secure it self into the threads for the tachometer drive slot and then presses the rotor off the crankshaft.
The replacement was then mounted on, awaiting the field coils/housing I bought off eBay which were described as testing good and also carry a guarantee. We'll see what happens...
Now the old BMW one has company on my bookshelf. Maybe I should start a collection of scrap rotors. They do make excellent paperweights
I bought this nifty puller months back. It has the left hand thread to secure it self into the threads for the tachometer drive slot and then presses the rotor off the crankshaft.
The old armature was well worn and scored up, but I've been advised that these are German built and almost never fail (don't know why the BMW bosch ones suck so bad then...), but also to buy another if you find one to keep as a spare because these are pretty rare. The problem is, I was supposed to be measuring 1.5 ohms on the slip rings and I didn't measure that on the old one or the replacement. The new one is in much better condition so I'm hoping that I just received the wrong info. The part is guaranteed if it doesn't work, but I just really want to fix this problem.
Now the old BMW one has company on my bookshelf. Maybe I should start a collection of scrap rotors. They do make excellent paperweights
26 May 2013
start-ups, decals, and nonsense
Well... I'm still without my tank back from powdercoating, so I threw the old one on to test out some things.
The video is short because when I went to lower the idle speed I accidentally stopped recording. I was too lazy to make another video so this is all you get... I didn't like the Dunstall replica muffler, so I took it off for shits and giggles and just ran the header pipe. The video doesn't capture the loudness of it, but I really love the sound, may even end up keeping it like that if the tuning isn't a nightmare. By the way, that blue beacon on the instrument cluster means my generator isn't charging, still have to figure that one out, but there's a really good electrical test process in the H-D service manual. For once that manual is good for something
Since I've been sitting on decals for over a month waiting for the tank to come back, I finally got a little antsy and put some on the rear fender. I was dying to get that Italian Air Force roundel on the bike somewhere given Aermacchi's aviation history.
Note the NOS tail light. In lieu of hunting down an unobtainium plug, I just soldered the wiring right to the bulb. It works, but it'll have to be corrected someday
Anyone else think this looks like it should be a box of condoms instead of gloves? 70% Thicker for NO pleasure
Also got around to welding up a new battery box. Smaller = less weight, and I still haven't even turned it to Swiss cheese. There's a certain charm about the old Italian bubble boxes, but on this bike I think less is more.
I had my wife sit on the bike so I could better visualize the lines with a rider on it.
Other than that dreadful stock tank, I think it's looking pretty good so far. It definitely needed those Condor bars and a more forward posture. The foot controls fit her pretty well, but I'm a bit taller and the bike is begging for rear sets when I'm on it. I'll have to weld on extensions onto the frame like the Sprint H had for the passenger pegs (my SS model was never intended for two-up use), and then find some nice Tarozzi's to mount on it. Money, money, money.....
It's beautiful out now though, I think I'm going to take the Beemer out for a nice midnight ride someone and enjoy this
The video is short because when I went to lower the idle speed I accidentally stopped recording. I was too lazy to make another video so this is all you get... I didn't like the Dunstall replica muffler, so I took it off for shits and giggles and just ran the header pipe. The video doesn't capture the loudness of it, but I really love the sound, may even end up keeping it like that if the tuning isn't a nightmare. By the way, that blue beacon on the instrument cluster means my generator isn't charging, still have to figure that one out, but there's a really good electrical test process in the H-D service manual. For once that manual is good for something
Since I've been sitting on decals for over a month waiting for the tank to come back, I finally got a little antsy and put some on the rear fender. I was dying to get that Italian Air Force roundel on the bike somewhere given Aermacchi's aviation history.
Note the NOS tail light. In lieu of hunting down an unobtainium plug, I just soldered the wiring right to the bulb. It works, but it'll have to be corrected someday
Anyone else think this looks like it should be a box of condoms instead of gloves? 70% Thicker for NO pleasure
Also got around to welding up a new battery box. Smaller = less weight, and I still haven't even turned it to Swiss cheese. There's a certain charm about the old Italian bubble boxes, but on this bike I think less is more.
I had my wife sit on the bike so I could better visualize the lines with a rider on it.
Other than that dreadful stock tank, I think it's looking pretty good so far. It definitely needed those Condor bars and a more forward posture. The foot controls fit her pretty well, but I'm a bit taller and the bike is begging for rear sets when I'm on it. I'll have to weld on extensions onto the frame like the Sprint H had for the passenger pegs (my SS model was never intended for two-up use), and then find some nice Tarozzi's to mount on it. Money, money, money.....
It's beautiful out now though, I think I'm going to take the Beemer out for a nice midnight ride someone and enjoy this
22 May 2013
slow progress
well the stripped banjo bolt threads on the cylinder head got fixed. I actually disassembled the head the morning after I found the problem and 4 hours and $15 later I had a nice heli-coiled head in my hands. Even better, through this predicament I met a great machinist just three blocks away who will definitely be getting more work in the future - hats off to you Greg!
Today this arrived in the mail:
1960's NOS Delco Guidex tail light for the Macchi. This is the tail light that would have actually been stock on the bike, which is strange because most other years used typical Italian CEV lamps and this is Made in USA by a GM subsidiary. I'm psyched to have it, pretty psyched to add a little American accenting to the bike as well despite all signs of this build pointing to the contrary. As cool as the vintage NAPA one that came with the bike was, it really just was a POS, I'm glad to have a brand new, well built light. Now I just have to figure out where to find a vintage plug that'll work with it
Talked with the powdercoaters and was informed that the tank should be ready this week, I'm keeping my fingers crossed. While I wait, I ordered some new brushes for the generator in an attempt to quickly and cheaply fix this apparent non-charging issue with the bike. I'm really hoping this is the cure because I hate dealing with wiring, and I have no idea where to find a good used armature for this bike.
Any vintage electric gurus are welcome to throw fix suggestions at me, as far as I'm concerned electric works by magic.
Today this arrived in the mail:
1960's NOS Delco Guidex tail light for the Macchi. This is the tail light that would have actually been stock on the bike, which is strange because most other years used typical Italian CEV lamps and this is Made in USA by a GM subsidiary. I'm psyched to have it, pretty psyched to add a little American accenting to the bike as well despite all signs of this build pointing to the contrary. As cool as the vintage NAPA one that came with the bike was, it really just was a POS, I'm glad to have a brand new, well built light. Now I just have to figure out where to find a vintage plug that'll work with it
Talked with the powdercoaters and was informed that the tank should be ready this week, I'm keeping my fingers crossed. While I wait, I ordered some new brushes for the generator in an attempt to quickly and cheaply fix this apparent non-charging issue with the bike. I'm really hoping this is the cure because I hate dealing with wiring, and I have no idea where to find a good used armature for this bike.
Any vintage electric gurus are welcome to throw fix suggestions at me, as far as I'm concerned electric works by magic.
19 May 2013
17 May 2013
And the top end needs to come off again
Called the powdercoating place and found out that they haven't even started the tank. I was pissed until I put the old tank on the bike, started it up and noticed a significant oil leak out of the head-side oil feed bolt. Took that off and realized that the threads on the head were stripped out about 1/2 way deep. Ran a tap to see if I could salvage anything to no avail. Looks like that wacky head is going to need to come off again so I can heli-coil it and then figure out how to blow the metal shavings out of the oil passages... Big sigh
16 May 2013
Aermacchi brake arm and small steps
I noticed some fraying on the brake cable so I wound up replacing it with a NOS one. Upon adjusting the front brake to the proper tension (which I didn't do last week), I found the brake arm to be fairly useless under pressure. Took apart the brake arm and realized the square hole that connects to the drum looked more like a pentagon. Figured the best option at the moment would be to weld a little bead on the rounded out sections and then file it down. The job probably would have been a lot faster if I had a dremel, but instead I had to use a drill and the smallest file in my tool box to somewhat square it off again. This is what I ended up with.
It's not square per se, but it does work, and more importantly it'll do the job while I search for a new replacement. It amazes me that what should be 5 minute jobs on this bike keep turning into 2 hour jobs because I keep finding something else wrong.
I'm still waiting for the gas tank to come back from powdercoat and that's holding up a lot of things, namely seat mounting (and possibly more fabrication) and carb tuning, but I suppose you can't rush quality. Since I haven't found any oil or gas leaks after reassembling the top end and running the engine briefly, I figured I'd finally mount the front fender.
I still have to knock out welding up a new battery tray, that'd be a good little job while I wait for the tank to come back.
It's not square per se, but it does work, and more importantly it'll do the job while I search for a new replacement. It amazes me that what should be 5 minute jobs on this bike keep turning into 2 hour jobs because I keep finding something else wrong.
I'm still waiting for the gas tank to come back from powdercoat and that's holding up a lot of things, namely seat mounting (and possibly more fabrication) and carb tuning, but I suppose you can't rush quality. Since I haven't found any oil or gas leaks after reassembling the top end and running the engine briefly, I figured I'd finally mount the front fender.
I still have to knock out welding up a new battery tray, that'd be a good little job while I wait for the tank to come back.
11 May 2013
the bike breathes again
Attached header and new Dunstall replica muffler
Typical of this project, looks like I'm going to need to modify some more. First off, I scratched the chrome on the muffler when I attached it as the centerstand tab was just touching the edge of the muffler. It was barely touching it, and I didn't even feel it or see it (it's behind the side stand bracket) when I assembled everything. Doesn't appear to actually go through the chrome, just looks kinda shitty, but it's out of view at least. The next issue is that other than the clamp to the header pipe, there's nowhere to attach the rear bracket to the frame. The stock Aermacchi clamp is too large, so I'll have to make one of my own as this is way too wobbly as it stands now. But hey, I finally got to use the exhaust wrap that I abandoned on my BMW build...
Also, since I ditched the stock battery and tool boxes, I'll need to make my own battery tray. No biggie, I think 20 gauge will do the trick
I worked out the cable issue by simply cutting off about 6-8mm off the end barrel on the cable. Cables are nice and smooth, and since I now have throttle, brake, and clutch control, AND the important stuff is assembled on the bike, I couldn't resist attaching the battery and trying to start it up.
Since I don't have my tank back yet, I siphoned some gas directly into the carb, gave it a little choke, and it started right up (well 3rd kick anyway)! The generator light that used to never light up which I wrote off as being broken, now doesn't seem to go out, but I didn't get to rev the bike enough before I ran out of gas so I don't know if it's really not working or if the generator just wasn't sending out enough charge yet. The wiring job I did for the headlights and horn also worked fine, and I'm glad I went through the wiring and replaced the bits I could.
Can't wait for the tank to come back and give this bike a proper test run
Typical of this project, looks like I'm going to need to modify some more. First off, I scratched the chrome on the muffler when I attached it as the centerstand tab was just touching the edge of the muffler. It was barely touching it, and I didn't even feel it or see it (it's behind the side stand bracket) when I assembled everything. Doesn't appear to actually go through the chrome, just looks kinda shitty, but it's out of view at least. The next issue is that other than the clamp to the header pipe, there's nowhere to attach the rear bracket to the frame. The stock Aermacchi clamp is too large, so I'll have to make one of my own as this is way too wobbly as it stands now. But hey, I finally got to use the exhaust wrap that I abandoned on my BMW build...
Also, since I ditched the stock battery and tool boxes, I'll need to make my own battery tray. No biggie, I think 20 gauge will do the trick
I worked out the cable issue by simply cutting off about 6-8mm off the end barrel on the cable. Cables are nice and smooth, and since I now have throttle, brake, and clutch control, AND the important stuff is assembled on the bike, I couldn't resist attaching the battery and trying to start it up.
Since I don't have my tank back yet, I siphoned some gas directly into the carb, gave it a little choke, and it started right up (well 3rd kick anyway)! The generator light that used to never light up which I wrote off as being broken, now doesn't seem to go out, but I didn't get to rev the bike enough before I ran out of gas so I don't know if it's really not working or if the generator just wasn't sending out enough charge yet. The wiring job I did for the headlights and horn also worked fine, and I'm glad I went through the wiring and replaced the bits I could.
Can't wait for the tank to come back and give this bike a proper test run
08 May 2013
new shoes, clean head, no-leak jug, and an entirely new set of problems
It's been a good few days of progress with the bike. First and foremost, I got the last wheel back from truing and got the tires mounted. Put them on the bike immediately. Also mounted the rear fender that was recently powdercoated, and now the seat won't fit. In fact, it's off by a good 0.25." Not sure how that's even possible, but I can either modify the existing seat (easy) or make a new one (not as easy). Once the tank comes back I'll decide on a course of action.
Otherwise, I'm liking the look already. By getting the wheels back on, the bike would be self supporting and I could remove the jackstand from below the cylinder, which, up to this point was the only thing other than the center stand holding the bike up.
Once I pulled the cylinder, I inspected the piston and con-rod. Turns out there is horizontal play in both the piston and the con-rod. In the case of the piston, the play was due to me being able to actually move the wrist pin with my finger (no heat applied) and seemingly the only stops on the pin were the snap rings. As for the connecting rod, there was only slight horizontal play. Figures the seals I was waiting on came in the same day, so instead of being able to reassemble everything I had to wait until the next morning to call Moto Macchi and see what he thought of the play. Apparently the play I noticed is normal, the con-rod is good since there's no up/down - forward/back play, and play with the wrist pins is hit or miss between batches but normal. It was good to hear that. If I saw that kind of play on the BMW I'd start disassembling the bottom end immediately.
Put everything back together this afternoon. Between a brand new cylinder base gasket, upper and lower pushrod tube seals, valve cover gasket, and the permatex silicone sealant I used on top of everything, this bike shouldn't puke oil anywhere other than the breather (I hope anyway)... I know I praised the design of the Aermacchi cylinder head in my last blog entry, but I retract that statement now. Having to shim the rocker ends on assembly, while holding the pushrods (which cross), and then drifting the rocker shaft on a horizontal head is not fun; in fact it downright sucks. I had to re-shim the rockers because I used new thrust washers and trying to check alignment with a mounted wheel getting in the way constantly didn't help either... But it's done now, just waiting on getting the tank back, making a new battery tray, and attaching the control cables and the bike should be pretty much done. Shit pic, but it doesn't hide the old oil stains
That reminds me. While I was waiting for the remaining seals to arrive, I mounted the bars, controls, and the dash pod.
This introduced an entirely new set of conundrums.
First, I didn't want to drill into the new Tommaselli condor bars, so I relocated the headlight/horn switch to the top of the dash. Because it was a new switch I had to solder up some new connections so I hope everything works right once the battery is hooked back up, otherwise I'll have to cut and re-solder again.
Next was the controls themselves. They look nice on the bars, but they definitely weren't intended for Aermacchi cables.
Tommaselli barrel on left, stock Verlicchi barrel on right, Aermacchi clutch cable below. The Verlicchi one won't fit into the Tommaselli controls, and although the Aermacchi cable can make it into the new barrel, the cable end is too long to fit into the lever. I think the easiest option will be to trim down the cable end and pray it doesn't come apart. To be continued...
Another smaller issue that arose was with the Tommaselli QA race throttle. I knew when I bought it that it was reduce the "pulling" distance of the cables for faster application of the throttle, but they really weren't joking... It's probably only 1/4 turn of the throttle and the slide is fully opened. I'm not sure how I feel about this just yet, I'll need to test it on the bike first to check the response, but I have a feeling I'll be reverting back to the stock Super Practic B throttle.
Otherwise, I'm liking the look already. By getting the wheels back on, the bike would be self supporting and I could remove the jackstand from below the cylinder, which, up to this point was the only thing other than the center stand holding the bike up.
Once I pulled the cylinder, I inspected the piston and con-rod. Turns out there is horizontal play in both the piston and the con-rod. In the case of the piston, the play was due to me being able to actually move the wrist pin with my finger (no heat applied) and seemingly the only stops on the pin were the snap rings. As for the connecting rod, there was only slight horizontal play. Figures the seals I was waiting on came in the same day, so instead of being able to reassemble everything I had to wait until the next morning to call Moto Macchi and see what he thought of the play. Apparently the play I noticed is normal, the con-rod is good since there's no up/down - forward/back play, and play with the wrist pins is hit or miss between batches but normal. It was good to hear that. If I saw that kind of play on the BMW I'd start disassembling the bottom end immediately.
Put everything back together this afternoon. Between a brand new cylinder base gasket, upper and lower pushrod tube seals, valve cover gasket, and the permatex silicone sealant I used on top of everything, this bike shouldn't puke oil anywhere other than the breather (I hope anyway)... I know I praised the design of the Aermacchi cylinder head in my last blog entry, but I retract that statement now. Having to shim the rocker ends on assembly, while holding the pushrods (which cross), and then drifting the rocker shaft on a horizontal head is not fun; in fact it downright sucks. I had to re-shim the rockers because I used new thrust washers and trying to check alignment with a mounted wheel getting in the way constantly didn't help either... But it's done now, just waiting on getting the tank back, making a new battery tray, and attaching the control cables and the bike should be pretty much done. Shit pic, but it doesn't hide the old oil stains
That reminds me. While I was waiting for the remaining seals to arrive, I mounted the bars, controls, and the dash pod.
This introduced an entirely new set of conundrums.
First, I didn't want to drill into the new Tommaselli condor bars, so I relocated the headlight/horn switch to the top of the dash. Because it was a new switch I had to solder up some new connections so I hope everything works right once the battery is hooked back up, otherwise I'll have to cut and re-solder again.
Next was the controls themselves. They look nice on the bars, but they definitely weren't intended for Aermacchi cables.
Tommaselli barrel on left, stock Verlicchi barrel on right, Aermacchi clutch cable below. The Verlicchi one won't fit into the Tommaselli controls, and although the Aermacchi cable can make it into the new barrel, the cable end is too long to fit into the lever. I think the easiest option will be to trim down the cable end and pray it doesn't come apart. To be continued...
Another smaller issue that arose was with the Tommaselli QA race throttle. I knew when I bought it that it was reduce the "pulling" distance of the cables for faster application of the throttle, but they really weren't joking... It's probably only 1/4 turn of the throttle and the slide is fully opened. I'm not sure how I feel about this just yet, I'll need to test it on the bike first to check the response, but I have a feeling I'll be reverting back to the stock Super Practic B throttle.
02 May 2013
fork seals and cylinder heads
Still waiting for the gas tank to come back from powdercoat, but the decals for it did come in, and more importantly so did the fork seals.
Not stock, but apparently this is what Moto Macchi offers. New and Made in USA which is a plus. but I've never seen seals like these. For one, they're considerable smaller that stock seals and are intended to "float" along the stanchion tubes - secured by a 30mm washer that rests below the circlip on the sliders. I guess it'll work, and there's a lifetime guarantee (although I guess that's kinda useless if they don't work)... Now with the seals in, the sliders went back on and I can go ahead and mount the tires on my rims - I'll get to that on Monday.
While I was waiting for parts to arrive, I figured I'd address the oil leak on the bike. Appears to originate from the head and more specifically the upper pushrod seal.
Not stock, but apparently this is what Moto Macchi offers. New and Made in USA which is a plus. but I've never seen seals like these. For one, they're considerable smaller that stock seals and are intended to "float" along the stanchion tubes - secured by a 30mm washer that rests below the circlip on the sliders. I guess it'll work, and there's a lifetime guarantee (although I guess that's kinda useless if they don't work)... Now with the seals in, the sliders went back on and I can go ahead and mount the tires on my rims - I'll get to that on Monday.
While I was waiting for parts to arrive, I figured I'd address the oil leak on the bike. Appears to originate from the head and more specifically the upper pushrod seal.
Off with it's head
I like these heads better than BMW ones. Very easy teardown and rocker play is taken up by shims instead of pillow blocks. Those pushrods are weird though, I wasn't expecting the cam followers to be horizontal but the pushrods aligned vertically, they criss cross at a point and the exhaust is larger than the intake to accommodate the difference in distance to the rocker arm (because it's on the outside of the head and the intake is on the inside). I don't know why but for some reason I thought the cam was vertical, driven by a gear attached to the horizontal crankshaft, don't know where I got that idea, but that's what I was thinking.
oil leak confirmed, good thing I ordered new pushrod tube seals. That being said, the other seal is at the cylinder base, meaning that needs to come off too and I didn't order a cylinder base gasket (d'oh!). I could probably make one up with an xacto knife and gasket material, but there's supposed to be a dowel pin in the head that is missing and some other crap here and there so it looks like I'll be putting in another order with MotoMacchi in the near future.
high(er) compression piston... Aermacchi went up to 9.4:1 this model year
Didn't bother taking the piston and cylinder off yet, that can wait till I get the wheels back on and the remaining seals in. Overall, things are looking pretty good. Don't really see any valve recession (but I will be doing a proper leakdown test), no pitting or scoring on the piston or head, and nothing else immediately visible. Will definitely check con rod play when the cylinder is off, but if that checks out I don't think I'll dig any deeper. I want this back on the road, not under a microscope.
Kenny (referenced in a previous post) told me I'm the kind of guy that'll take apart a watch. I denied it, but he's probably right
26 April 2013
fork alignment
forks were way off on the y-plane, like a good 1.5" or so... figured I'd give the old-timer BMW method of y-plane fork alignment a try
after tightening up the rope every hour for 4 hours, the forks didn't move at all.
What did move the forks was sitting on top of the frame and holding the 2x4 with my own hands and using my own strength to re-align them. After about 2 minutes I got them to within about 1/8" of alignment and will close that gap tomorrow or later since I'm still waiting for fork rebuild parts.I'm amazed with all the force put on the tubes that they're still in perfect alignment on the x plane
20 April 2013
oh those Italian forks
Woke up alone in the house today after coming home from a night shift. Figured I'd take advantage of the "me" time and get the fork sliders off and cleaned while I wait for the seals to arrive (and my wife and daughter to get home).
First issue I ran into was the bolts that go into the damper to hold the sliders on
Sliders are off already, but I put the bolts back in so I don't lose them. The one on the left had a cap head with 6mm allen head on it. No worries, 6mm allen wrench out, bolt out. Couldn't get the wrench into the one on the right. Turns out the head is for a 5.5mm allen wrench. Glad my set came with a 5.5mm one, took it out and voila, both are out. Looked at both bolt heads and it's not like one was rounded out or messed up in any way, they're just two different sizes, weird.
The slider on the right popped off immediately, the one on the left needed some persuading. Found the slider to be slightly seized to the damper rod but enough of a jerk freed it. Even though I drained the forks before disassembly, I found some water at the bottom of the left one so that would explain that, doesn't look like anything was damaged though.
Took a large piece of glass that used to belong to the hard top of my VW Typ 181 and laid it across the forks. Looks to be out of alignment on the y plane, but the x plane is honky dorry. That'll be next on my list of stuff to tackle. They otherwise appear smooth, clean, and unbent.
Figure the realignment will take 3-4 hours, then it's hurry up and wait again. Maybe I'll start getting my handlebar and controls out of the packaging and prepped for mounting
First issue I ran into was the bolts that go into the damper to hold the sliders on
Sliders are off already, but I put the bolts back in so I don't lose them. The one on the left had a cap head with 6mm allen head on it. No worries, 6mm allen wrench out, bolt out. Couldn't get the wrench into the one on the right. Turns out the head is for a 5.5mm allen wrench. Glad my set came with a 5.5mm one, took it out and voila, both are out. Looked at both bolt heads and it's not like one was rounded out or messed up in any way, they're just two different sizes, weird.
The slider on the right popped off immediately, the one on the left needed some persuading. Found the slider to be slightly seized to the damper rod but enough of a jerk freed it. Even though I drained the forks before disassembly, I found some water at the bottom of the left one so that would explain that, doesn't look like anything was damaged though.
Hey! I finally got to use my circlip pliers I bought years ago. The fork seals have seen better days...
Took a large piece of glass that used to belong to the hard top of my VW Typ 181 and laid it across the forks. Looks to be out of alignment on the y plane, but the x plane is honky dorry. That'll be next on my list of stuff to tackle. They otherwise appear smooth, clean, and unbent.
Figure the realignment will take 3-4 hours, then it's hurry up and wait again. Maybe I'll start getting my handlebar and controls out of the packaging and prepped for mounting
19 April 2013
more problems, more parts
After about 2 weeks of debating, I decided to drop off the gas tank for powdercoating. My rationale was that this way the color would match the fenders and rims 100%, should be a tougher finish, and the cost was well below that of paint. I was mulling around the idea of painting the tank myself, it worked out somewhat ok with the BMW, but I'd like to hold this bike to a higher standard than my daily rider. I also bought some decals from Moto Macchi to decorate it with.
From the beginning I wanted this to be an "Aermacchi," instead of being labelled as an Aermacchi/Harley Davidson. With that in mind I ordered some late 50's macchi decals (pre-H-D acquisition) for the sides of the tank
The guy at Moto Macchi says in reality they are actually a dark navy and silver color instead of the greenish color represented in the gif. Either way they're on backorder from Italy so it'll be awhile before I see them in person.
Also got a neat race sticker for the top of the tank by the gas cap.
That I did receive in the mail, but it was easier to post the gif from the website. I always loved the look of such things on MV Agusta tanks and Aermacchi does have a race pedigree, in fact Harley's only road race victories were on Macchis, even though they pretend that part of their history never existed.
I should be receiving the gas tank back from powdercoat in another week or so, around the same time I should be getting the rear wheel back from truing out in California. You'd think things would be flying with the bike but small issues keep popping up that put things on hold.
I ordered another seat of bearings for the steering head. Apparently unsealed ball bearings are a rare commodity nowadays, so they came from Moto Macchi as well. Decided just to replace all the bearings instead of waiting till a later date and I now have peace of mind in that respect. However on reassembling the forks I found both seals to be leaking pretty badly. Don't know why the leak is just showing up now, but I have a feeling it has to do with the forks moving so much off the bike that the leaks were always there but just finally exposed themselves to a greater degree. Now I have a set of seals on order (going to be attached to the tank decals once they arrive from Italy) and I guess I'll just do a full fork rebuild.
While I had the triple clamp off I figured I'd lose the battered black paint and polish the upper and lower clamp up. I'm happy with the results. Also applied some touch up paint to the frame and cleaned up this and that. She looks pretty in the nude, going to have to attack that engine with some elbow grease and polish in the near future as well...
Also disassembled the instrument pods again and began digging through the electric. So many damaged wires and aged connections. I wound up cutting most of the splices to expose cleaner copper and resoldering everything. Thankfully there aren't too many wires on the bike. I took a look at the NOS CEV model 8042 horn/light switch that I bought to replace the original one on the bike and found a ton of wiring that doesn't match the wiring on the bike. Looks like I'll have to cut and splice again somewhere, but I'm going to hold off until the handlebars and controls are mounted. I don't want to make anything too short or awkward
So once again it's hurry up and wait. In the meantime I'd like to give a shout out to the shop doing the powdercoating. I've been using GSD Coatings in Keyport (http://www.gsdcoatings.com/cmsms/) and I've been really pleased with the work so far. The prices have been more than reasonable and the parts are coming back better than I'd have imagined. It's pretty cool looking at all the Ducati stuff in the shop when you go in as well. Ducati frames, tanks, and even a whole bike are in the offices. I think they have a race team as well.
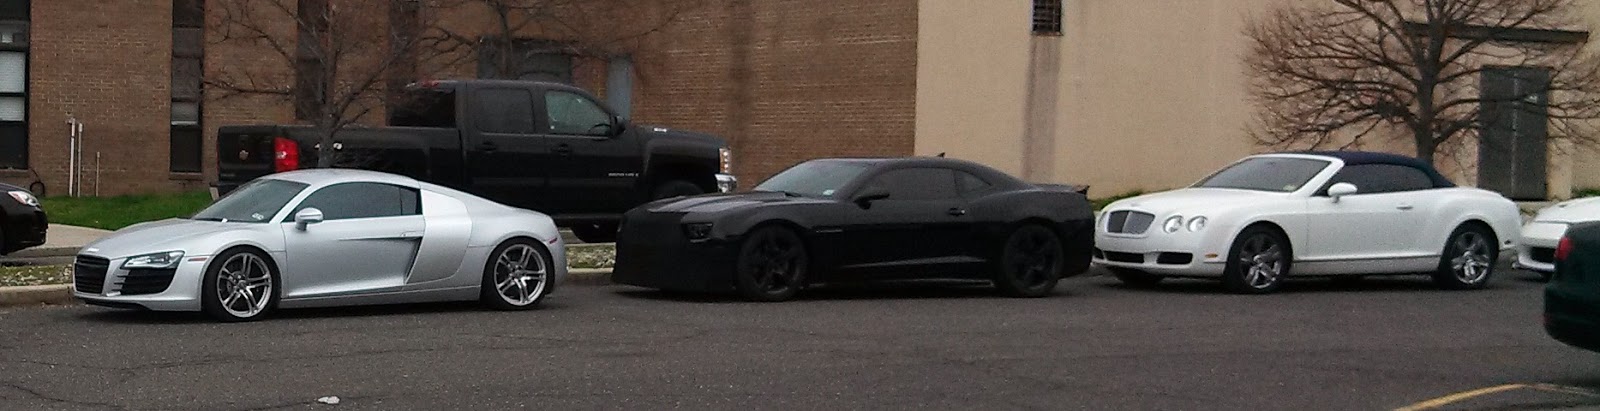
Caught this outside the building when I was dropping off the tank... You don't ever see anything like this in my corner of NJ
They must belong to Lux Motorwerks next door to the place. My daughter looked at the R8 and said "oh look, Daddy's car!" I wish baby, I wish...
From the beginning I wanted this to be an "Aermacchi," instead of being labelled as an Aermacchi/Harley Davidson. With that in mind I ordered some late 50's macchi decals (pre-H-D acquisition) for the sides of the tank
The guy at Moto Macchi says in reality they are actually a dark navy and silver color instead of the greenish color represented in the gif. Either way they're on backorder from Italy so it'll be awhile before I see them in person.
Also got a neat race sticker for the top of the tank by the gas cap.
That I did receive in the mail, but it was easier to post the gif from the website. I always loved the look of such things on MV Agusta tanks and Aermacchi does have a race pedigree, in fact Harley's only road race victories were on Macchis, even though they pretend that part of their history never existed.
I should be receiving the gas tank back from powdercoat in another week or so, around the same time I should be getting the rear wheel back from truing out in California. You'd think things would be flying with the bike but small issues keep popping up that put things on hold.
I ordered another seat of bearings for the steering head. Apparently unsealed ball bearings are a rare commodity nowadays, so they came from Moto Macchi as well. Decided just to replace all the bearings instead of waiting till a later date and I now have peace of mind in that respect. However on reassembling the forks I found both seals to be leaking pretty badly. Don't know why the leak is just showing up now, but I have a feeling it has to do with the forks moving so much off the bike that the leaks were always there but just finally exposed themselves to a greater degree. Now I have a set of seals on order (going to be attached to the tank decals once they arrive from Italy) and I guess I'll just do a full fork rebuild.
While I had the triple clamp off I figured I'd lose the battered black paint and polish the upper and lower clamp up. I'm happy with the results. Also applied some touch up paint to the frame and cleaned up this and that. She looks pretty in the nude, going to have to attack that engine with some elbow grease and polish in the near future as well...
Also disassembled the instrument pods again and began digging through the electric. So many damaged wires and aged connections. I wound up cutting most of the splices to expose cleaner copper and resoldering everything. Thankfully there aren't too many wires on the bike. I took a look at the NOS CEV model 8042 horn/light switch that I bought to replace the original one on the bike and found a ton of wiring that doesn't match the wiring on the bike. Looks like I'll have to cut and splice again somewhere, but I'm going to hold off until the handlebars and controls are mounted. I don't want to make anything too short or awkward
So once again it's hurry up and wait. In the meantime I'd like to give a shout out to the shop doing the powdercoating. I've been using GSD Coatings in Keyport (http://www.gsdcoatings.com/cmsms/) and I've been really pleased with the work so far. The prices have been more than reasonable and the parts are coming back better than I'd have imagined. It's pretty cool looking at all the Ducati stuff in the shop when you go in as well. Ducati frames, tanks, and even a whole bike are in the offices. I think they have a race team as well.
Caught this outside the building when I was dropping off the tank... You don't ever see anything like this in my corner of NJ
They must belong to Lux Motorwerks next door to the place. My daughter looked at the R8 and said "oh look, Daddy's car!" I wish baby, I wish...
14 April 2013
Sunday Ride / Classic Cycles (ltd) Crawfish Boil
The planets must have aligned as I had a day off, beautiful weather, and a motorcycle event all on the same day. Total riding amounted to 170 miles (273km), haven't had a day of riding like that in probably a year or so. Met up with Chris K in the morning and set off for conquering
It's Nutts... and delicious. Brunch around Trenton
Got to classic cycles early, place was packed by departure time
some motorcycles of interest
killer Norvin
bobber for sale
bultaco racer - only ever seen the enduro looking ones till today
Lucky for me Chris knows a lot of people, so I got to meet a lot of new faces - even finally met the legendary Dick Gambino. Also was introduced to some Gasket Goons and in turn their clubhouse which is fucking awesome. There were some major projects are under construction including a tattoo shop, antique shop, hot rod shop, and flea market to name a few. I'm definitely going to have to head back out there to see how things are going, it'll be a great excuse for another ride too. The guy Josh running things is completely living the dream.
Badass baby seat
And with all this, my nice little break from work is depressingly over. I'll be back on night shifts next weekend so I'll be missing the Gathering of the Nortons and if my schedule holds as is, it looks like I'll be on night shift for this year's Deutsche Classic show in July...
On the upside, I sent out the rear rim for the Aermacchi out to California for truing yesterday, so hopefully I'll have it back by next week and can get the wheels back on the bike. Since the powdercoating is completely done and wrapped in the garage I'm going to have to hustle and finish up stripping (and then painting) the gas tank. After that, it should just be a matter of mounting the new bars/controls, retuning the carb, and a little wiring work and the Aermacchi should be on the road.
Should be...
Subscribe to:
Posts (Atom)